Tuesday, February 23, 2010

St Patty's Wreath


Warning: If you get a little weirded out by people who really love St. Patricks Day, stop reading now!!

For many of you- Valentines Decorations are followed by Easter ones. But not in my house, oh no sir-ee. There is a very important holiday so dear to my heart that is one of my favorites to celebrate in between the two. I really don't have one big reason why I love St. Patricks Day, maybe because of my Irish blood, but I have for as long as I can remember.
My mom and aunts always made a big deal about it and so I guess that is partly the reason. I also love the Irish culture- the music and dancing especially! I remember as a kid searching for a leprechaun with my cousin in my backyard- totally thought they were real and well kinda wish they were.
It was funny, I was having a conversation with my previous manager awhile back informing him of all the good holidays that I had to work the previous year and he totally laughed when St. Patricks was included on that list.... He still makes fun of me for it.
We have some fun traditions, but I will share those later. For now, I wanted to show you my new little wreath. It may look pretty familiar, since it is pretty much a copy of the felt heart wreath (idea room)- however I did make some changes
-It's green and circular instead of a red heart (probably didn't need to write this one)
-I cut out heart shapes instead of circles to give it more of a "Shamrocky" look
-I used two different colors
-Attatched a schnazzy gold ribbon


Get excited, some more ST Patricks Day posts coming your way!!

Monday, February 22, 2010

Mexican Lasagna

(picture from TPWC)
Does anyone else get sick of their recipes??? Well it happens to me all the time and makes planning out the weekly menu/grocery list pure torture. My friend came to the rescue recently by introducing me to The Pioneer Woman Cooks I had heard about this woman but never took the time to check out the website. Well I finally did and was Blown away-WOW can this woman cook!! Not only do the recipes taste amazing, her photography and step by step directions are beautiful and pure genius- just what a beginning level cook like me needs!
Last night I made the Mexican Lasagna (a recipe on her website but from a guest blogger) and boy was it tasty, highly recommend it!! I just couldn't get over how much flavor was packed into a dish.
And I also learned that cooking your rice in chicken broth instead of water = the best thing ever

Ok SO here ya go, the fab recipe:
(but please go here to follow the amazing step by step directions)
Prep Time: 45 Minutes Cook Time: 35 Minutes Difficulty: Easy Servings: 8

Ingredients

4 cups Unprepared Rice

6 cups (to 8 Cups) Low Sodium Chicken Broth/stock

4 whole (to 8) Tomatoes (up To You)

2 whole (to 3) Onions (up To You)

8 cloves (to 14 Cloves) Of Garlic (up To You)

Taco Seasoning (or Chili Powder, Paprika, And Cumin) To Taste

1 can (to 2 Cans) Black Or Pinto Beans (up To You)

3 pounds Lean Ground Beef

2 jars (16 Ounce) Salsa Verde

Flour Tortillas

3 packages (16 Ounces) Mexican Cheese Blend

1 jar (16 Ounce) Enchilada Sauce

3 cans Corn, Drained

Sour Cream, to taste

Cilantro, to taste

Butter

Preparation Instructions

Begin by preparing rice with chicken broth/stock. Once prepared, salt to taste. Chop up tomatoes, onions, and garlic as small as you prefer. Saute in pan with a tablespoon or so of butter. Add approximately 3 tablespoons chili powder, and 1 ½ tablespoon of both paprika and cumin. Stir until nicely combined. Feel free to add beans if you like them… no need to drain. Mix cooked rice together with tomato/onion/garlic mixture.

Brown the ground beef using about 3 tablespoons chili powder, 1 ½ tablespoon, paprika and 1 ½ tablespoon of cumin and salt to taste with about 4-6 ounces of water to create the taco beef.

Spread one container of salsa verde in the bottom of a large casserole or baking dish. Layer on tortillas covering salsa verde. Some overlapping is expected. Divide your rice mixture in half and spread it over the layer of tortillas. Divide cheese in half and layer it on top of the rice layer. Approximately 24 ounces of cheese per layer. Add another layer of tortillas on top of your cheese layer. Pour enchilada sauce over the tortillas and spread it out evenly. Add layer of browned ground beef. Add 3 cans of corn (drained) on top of beef layer. Then the remaining amount of rice mixture on top of corn layer followed by the remaining jar of salsa verde, on top of which you will add the remaining cheese (approximately 24ounces) to the top…this is our final layer of ingredients. Sprinkle top with some taco seasoning or cayenne pepper.

Bake at 375ยบ for 25-35 minutes until cheese has melted and begins to brown a bit.

Enjoy!

p.s.- I am thinking I want to post a recipe EVERY Monday for those of you like me who are in need of new ideas to start off your week with!!
And also, if you have any favorite recipes from the pioneer woman, let me know!!

Friday, February 19, 2010

Ruffle Shirt

Need another idea using cheap shirts??

I am really into ruffles on clothes these days and it seems like I am always seeing them in stores such as this one this one and this one- unfortunately these are way out of my price range right now.

So when I saw this cute idea (a long time ago) I was thrilled!!
One night this week while enjoying the Olympics- I decided to try it out

I had purchased two shirts at Target (the same time I bought these)
Remeber they were .75 cents each!!

Here is the before
(two shirts. you need two. one lousy picture. sorry)

Here is the after


Fun huh- totally looks J Crew-ish wouldn't you say!

p.s. I just saw this tutorial for something similar
 Cute Cute Cute, totally doing it


Wednesday, February 17, 2010

Tie Shirts!!

I think I have found a new obsession!!

These were SO fun to make
and CHEAP!

Here is how you make them

First gather the supplies

(note: for the fusible webbing, I love Steam a Seam 2 and always have used it-except for the time when I went to Michaels and was forced to buy that useless stuff pictured above- still did the job I guess)
-you also need a sewing machine and coordinating thread)

Next make a tie pattern (or copy the cute and wonderful one from here- has sizes and all- brilliant) trace it onto your fabric and cut out.  

Then trace your tie onto your fusible web and cut it out-
Then place the fusible web onto the back of the fabric tie. All you do is peel one side of the paper off and stick it to the tie. If you don't get it straight on (like me) you can just peel it off and try again.
Now place it on your shirt, follow the instructions on the fusible web package, and iron the tie into place.

Almost done
Now get your sewing machine and do a little zig zag around the edge of the tie

and YOU'RE DONE
Easy Huh

Wanna know what makes this project ten times better
Each shirt cost me under a dollar!!

Purchased the shirts at Target recently for .79 each
and then used fabric from a pair of shorts I bought for my husband at Kohls for .99.( I bought him like 9 pairs of different shorts because of the great deal and these were one of the pairs that didn't fit, even if they did- what guy needs nine pairs of shorts, not mine!)

Wanna know another secret and great way of getting cheap fabric??
Go to the Dollar Tree-that's what ours are called out here and check out their clothing section. Usually pretty small-but has a couple treasures in it
I recently purchased 4 "Vintage Jackets" (what it said when they rang up.. felt a little bit cooler)
for a dollar each- Little did the cashier know that I would be cutting them up and using the fabric for my projects. Anyway here are a couple, kinda cute huh


$3 for a whole lot of fabric


I really enjoyed this project- great cheap way to spruce up some plain shirts!!

Now my little man is all ready for church, so cute


Tuesday, February 16, 2010

Some Weekend Recipes

I fell in love with these two recipes this weekend.
The first one is Wisconsin Cauliflower Soup- Have any of you had this from Zupas?? It is one of the soups I would ALWAYS get-and have missed having it in my life- Anyway, I was so excited when I came across the recipe for it on my good buddy Heathers blog and had to make it. It turned out pretty amazing and just to explain how amazing- my husband- after his first bite asked if there was anymore left because he already knew he needed seconds! Ha So try it, you will LOVE it!

Wisconsin Cauliflower Soup

(Thank you Zupas for the pic)

Yields: 4-5 servings

2 tablespoons margarine or butter (1/4 stick)

1 medium onion, chopped

1/4 cup all-purpose flour

1/2 teaspoon salt

2 cups milk

1 can (13 3/4 to 14 1/2 ounces) chicken broth

1 head (2 1/2 pounds) cauliflower, cut into 1-inch pieces

1 teaspoon Dijon mustard

1 cup shredded cheddar cheese

1 cup pepper jack cheese

In 4-quart saucepan, melt margarine or butter over medium heat. Add onion and cook until golden, about 10 minutes, stirring occasionally. Stir in flour and salt; cook 2minutes, stirring frequently. Gradually stir in milk, chicken broth, and 1 1/2 cups water; add cauliflower and heat to boiling over high heat. Reduce heat to low; cover and simmer until cauliflower is tender, about 10 minutes. In blender (with center part of blender cover removed to allow steam to escape), blend cauliflower mixture at low speed in small batches until very smooth. Return cauliflower mixture to saucepan; heat over medium heat until hot, stirring occasionally. Remove saucepan from heat; stir in mustard and 1 1/2 cups cheese until melted and smooth. Garnish soup with remaining cheese to serve.

The second recipe of the weekend is Crockpot Applesauce- Seriously- for me- anything cooked in the crockpot is a winner!
This was super sweet and easy. Perfect for a snowy weekend stuck inside!

Crockpot Applesauce
recipe from Barbara Bakes.. and a million other places


5 medium-sized Gala apples, peeled, cored, quartered, and sliced
5 medium-sized Golden Yellow Delicious apples, peeled, cored, quartered, and sliced
1/4 cup sugar
1 tsp ground cinnamon
1/4 cup water or apple juice
Place all of the apple pieces in a large bowl and stir in sugar and ground cinnamon. Pour water or apple juice into the bottom of a large crockpot (slow cooker) and add the apple mixture. Cover, turn the crockpot setting to Low, and cook for about 8 hours (or on High for 5 hours), stirring occasionally.
Serve warm or room temperature.

Hope you enjoy them as much as I did!!

Sunday, February 14, 2010

Valentines Chair Backer

I have had my eye on these for awhile now 


Yes, they are from Pottery Barn

I really wanted to try making my own this year and found a great tutorial here -but realized it would take a lot more time than I had.
Anyway, I was really excited when I saw this website with great step by step instructions. Did a little at work and finished it up at home in no time-(Note: The tutorial says that you need 3 pieces of stiff felt- but I only had to use two- I think it is an error. Also they used glue alone to hold theirs together, where I along with the glue added a quick backstich to mine- just to hold it together extra tight!)
Here is how it turned out!!

Just love that is hangs on the back of the chair.
Was just perfect for holding little gifts in

REALLY this was such an EASY quick project!!

Hope you all had a great Valentines Day!!!

Friday, February 12, 2010

Valentines Day Gifts

Here is a glimpse at what I am giving my "VALENTINES" this coming Sunday.

So I was being serious when I said I was going to make these two projects. I decided to give them both to my husband.
First is my little "Coupon Book of Love"- idea from here
Let me tell you how easy it was using cards instead of having to cut out cardstock, such a great idea
I had a lot of fun with this and think the husband will like it
SO fun and So easy!! I included a coupon for a 10 massage from me (more than 10 min would just do me in, my poor husband :)  )
We joke at how bad I am at giving them so that's why I included a REAL coupon (gift certificate) for him to get a REAL massage- he will discover that on one of the cards.

The next is what I like to call a "Poor Man's Valentine Card" basically because it's used with 
Paper Bags (seen here)
This was SO much fun to make

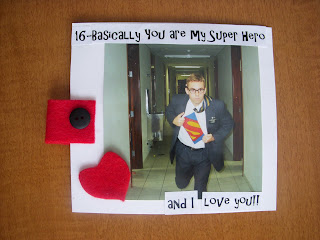
There are about 8 diferent cards he can pull out with a Reason why I love him/ picture attatched on each side
Here are a few examples

(inside joke)

(click to enlarge, one of my favorite pics of my hubbie)
Such fun and inexpensive gifts (well minus the massage gift cert.)

Oh and here are a couple more felt food desserts I am giving my son to add to his "fatty" and "sugary"
felt food collection!

I really need to make him some veggies!


Wednesday, February 10, 2010

Celebrate the Holidays- Mr Potato Head Style!!

I have been dying to make a Mr Potato Head out of felt ever since Christmas time. I saw the idea at Make it and Love it and thought it was brilliant. Well yesterday I finally got around to it and here are the results...


I briefly read over these directions here and went to work.

After finishing, I really wanted to add something elso to it. For those of you who don't know me, I go nuts over all the holidays, I just love them. So... I decided to give my Mr Potato Head some festive parts...
here are some for Valentines Day


And then some for St Patricks Day (one of my favorite holidays I might add)


Here is how they looked on....

What do you think??

I loved adding the extra pieces and think it will be a fun way to celebrate the holiday. Don't worry, Easter and 4th of July pieces are in the works.... I hope to have them for all the holidays. Check back for them soon!!
By that time I probably should think of making him a wife!!! Let me know if you make one!!

Saturday, February 6, 2010

Weekend Ideas

Spent my lovely weekend working in the ER. Luckily it was pretty slow and relaxing , giving me plenty of hours looking for some fun Valentine Ideas. Here are a couple I stumbled across that I wanted to share.
V day gift Ideas

I thought this was such a cute idea- Valentines Day coupons on face cards. Here they give you the instructions and a list of coupon ideas!! It is on my to do list this week- adorable


Same with this one- Check this CUTE idea HERE
and here is another idea simliar to these two that was cute

Cards
I really want to learn how to crochet a heart- Over at Little Birdie Secrets they share a video on how to do it and some cute ideas of how to use it after

Go here to print this card

Crafts
I am in LOVE with this- here is how you do it

And I have been wanting to make this wreath for forever and fell even more in love with it when Dana at MADE sprayed it pink. SO cute


Treats
These looked pretty fun to make- See Here


I love Valentines Day!!
Pretty fun ideas huh (Can you tell I was really bored at work!!)
Let me know if you have any fun Vday projects you are working on, I would love to know!!

Thursday, February 4, 2010

Inspired by Sour Cream...

When I went home for Christmas, my mother in law had such a fun craft for us to do. She told me that these cute little things were inspired by the little holders the sour cream at Wendys came in. Anyone know what I am talking about???
Anyway, it's the perfect little holder for treats, love notes, money, letters, um sour cream I guess...etc... We made a lot of these and gave them away at Christmas time, but perfect for V-day, your kids, teachers, classmates, Vteachers , neighbors....
Here is how you make them
The Supplies

First take a sheet of paper, cardstock or wrapping paper- try not to get too heavy of paper

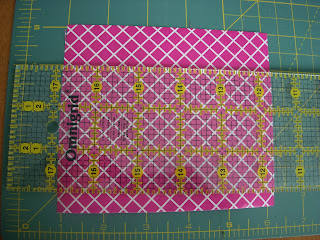
For the typical smaller size ones we cut the paper 4 1/2 by 5in. We did make one 6-7 in and turned out cute as well.

After cutting take one of the smaller ends and stick a piece of double sided tape on it. Join the two smaller end sides together and stick together in the middle, making a tube.

Then take one end, stick another piece of double sided tape inside on the edge and press it down

Next take your crimper (boy was it great to find a reason to use this after my scrapbooking days) and crimp the end you just taped.

The crimping showes up better on this paper

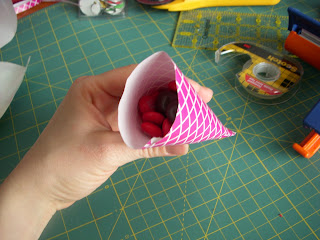
Next fill with candy or whatever you want

Now do the same thing to the other side but fold it the opposite way the previous one went, and crimp

Now you're almost done, take your hole puncher and punch a hole at the top.

This part is up to you, I like to put a ribbon through and attach some sort of tag so you can address who it goes to. Again, you can be creative at this part!!


Fun Huh!!
Well that's it- the sour cream holder- pretty easy- funny what things can inspire us huh!!