Showing posts with label fabric. Show all posts

Wednesday, August 3, 2011

Fabric Bookmarks

I am an aunt to 10 adorable girls.  Recently, I was thinking about how I wanted to step it up to become a "cooler" aunt. I live so far away from all of them which at times, makes it hard- but certainly not impossible. I saw these fabric bookmarks over at Little Birdie Secrets and decided it would be the perfect gift for my girls!! 
(Get tutorial HERE)
This was such a fun project!! The possibilities are endless!! I finished them during my vacation in Utah and lucky enough, 4 of my nieces were in town!! It was fun to make them part of it and get their opinion on which flower and button to pair with each bookmark.
This is for sure a project I will want to repeat many more times!!

Wednesday, November 17, 2010

TuRkEy HeAdBaNd!!

My craft addiction started full force with this project last year


Like my son's skeleton costume, my inspiration came from Pottery Barn.
It was one of my first projects where I had no formal directions, just an idea to go off of.
Looking at it this year, I realize there are many things I could have done differently (like making the feathers a little bit smaller...) -
 but the fun is in learning right....
Overall, this was a fun project and taught me that homemade opposed to store bought can sometimes be more exciting!

Thursday, November 11, 2010

Thanksgiving Banner

 My mantle was looking pretty plain this year after putting all my Halloween decor down. Even though it is a short time until we will put up our Christmas decorations, I decided to make something to spruce it up.
I pulled a couple ideas I have seen recently together and came up with this


This was pretty simple, just took a bit of time to put together.
I cut each of my squares 6X8 (however now measure 5X7 after front and back pieces sewn together) 
As you can see, this is not hanging up on my little mantle- it was way too big but I like it this way- so you can  obviously adjust your square size to fit where you want it to go

My letters are felt and embroidered on using a back stitch
I originally planned
 on attaching rings onto each little panel through an eyelet
and then threading some sort of rope through but
in the end decided on using ribbon to attach everything together
-I still may change it later on, but for now, I am happy!

Wednesday, October 20, 2010

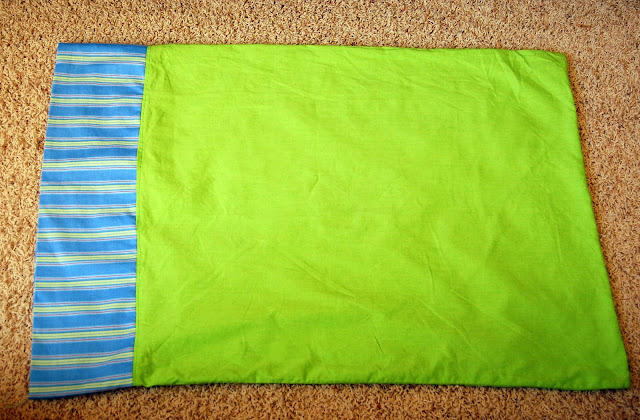
Halloween Pillowcase!!

I made this a couple weeks ago for a little Halloween present for my son. 
It was a breeze to make and such a fun gift to give!!
 I used the tutorial on the MADE  blog here which was fabulous.

This could also serve multiple purposes!!
When I was probably too old to go trick or treating I took my pillowcase out as my bag and I must say, you can hold way more candy when you bring one of these!!

 I ended up making another one for my son to use after Halloween! Not going to lie, I could have made twenty more they were so quick and easy. 
I'm already on the lookout for some Christmas fabric!!


 If you are looking for a fast, fun project, this is the one for you!!!

Thursday, September 23, 2010

Halloween Banner


I just had to make one for Halloween!!!
(sorry for photo quality, have had some gloomy days)

Such a great way to use up some extra fabric. (Or a great excuse to buy some more!)
I cut the letters out of felt and sewed on with the machine. 
I just love festive banners!!


Here are some other fun banner ideas/examples!

Eighteen25  (have you checked this site out?? Great Halloween ideas posted everyday!!!)

Wednesday, June 30, 2010

Fabric Flower Necklace

Ok I have been dying to make one of these for a long time now and finally got around to it!!
I was so excited to show my husband and see what he thought when I was finished!! 
Well when I showed it to him, he told me
it reminded him of a medal... and not a "necklace" he is used to!
(in the nicest way possible)
Awesome

Well medal or no medal, here is my "necklace" or bib as many call them
made especially for some upcoming family reunion pictures!


I got some inspiration and instructions here

try one, I dare you... you will get addicted!!!

Can't wait to make some more!!

Tuesday, June 8, 2010

Gone Fishin


This project was so much fun. Even my husband was excited about this one. 

My friend and I had previously been talking about how we wanted to make a little fishing set
and were so excited when we came across this great idea and tutorial.

We got together and went to work
(I must say doing crafts with friends is so much better than doing them by yourself) 

end result:

my son LOVES these
He asks to fish all the time
and believe me
 this makes for a happy fisherman husband

Sunday, May 30, 2010

Festive Banner


Currently I am obsessed with making banners. My talented friend made me a banner similar to this for St Patrick's day and I have been dying to make one ever since
Since tomorrow is Memorial Day, I thought is was appropriate to get it out the one I made for the Fourth, hang it up and make a post of it!

This was SO simple
trust me, you can make it

To make it the way I did 
All you need is

Coordinating Fabric
 Thread
Cut your fabric into triangles
Place triangles in your Bias Tape
Pin in place
Sew Across

*I used 8 triangles but you can use as many as you like. Big or small/ Long or Short

Have fun!!
(and expect some more of these from me in the near future!)
Happy Memorial Day!!

Tuesday, May 18, 2010

10 Minute Beanbag!

{ took me a little longer but I am sure you sewing pro's out there could whip one out in ten!}

Sunday morning I needed a beanbag and I needed one quick. I am the music leader for the little kids at church and I had planned to use a beanbag as part of this weeks lesson- It totally slipped my mind that I actually needed to get a beanbag until hours before church. I had seen a couple ways to make your own beanbags before and I remember it looking pretty simple, so I went for it. 
For those of you wondering how to make some cute beanbags for your kids or whomever, here is how you do it {or at least how I did it!}
First gather supplies.... 
fabric/muslin, sewing supplies, beans (not pictured)
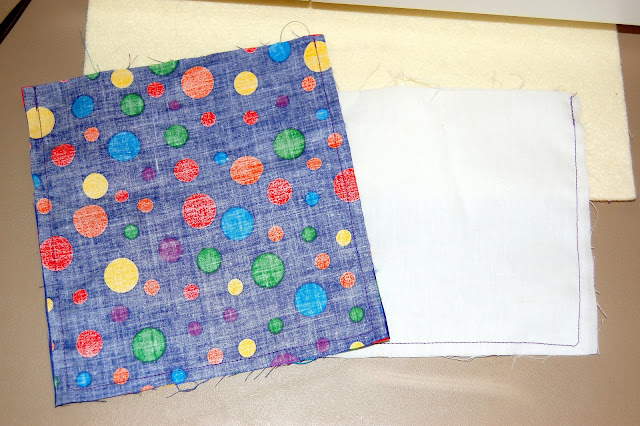
Next cut out your fabric- 7 X7 inches for the polka dot fabric and 6 X6 inches for the muslin
(wow could I take worse pictures or what! Can being in a hurry be a good excuse?!?)
 Now take your pieces and place them on top of each other (being sure to match them up)- right sides together and sew around the edge on three sides
Now take some scissors and clip the corners that you have sewn- this helps the fabric lay better in the corners
and then turn the right side out
Now take you beans (or if you are desperate like me making these last minute... corn etc..) and pour about 2 cups into your muslin pouch
Once filled, fold the top 1/2 inch of the opening into the bag and sew shut. If it doesn't look pretty, don't worry, no one will see it!
Now slip your little muslin pouch inside the larger pouch
And then just like the muslin- fold the top 1/2 inch into the bag and pin together (this one should look nice!)

Finally sew around all four corners about 1/4 inch from the edge and you're done!!!
thanks to Family Crafts for the help!!

now that I have my beanbag, I may be able to join in on a game of Corn hole- a beanbag toss game that apparently is super popular out here in the Midwest- my neighbors seem to like it and stay up playing it all night long OUTSIDE every weekend!  

Monday, May 17, 2010

Fabric Key Chain


I have been wanting to make a fabric key chain for a long time now!!
I have a big problem with loosing my keys... in my purse- (OK and everywhere else)
 I am ALWAYS looking for them!! 
I finally got around to making one last week and things are SO much better!! There is a great tutorial here-(The Idea ROOM via U create) It has great easy to follow steps!!
Here is how mine turned out!!!
Fits perfectly around the wrist- which helps while unloading groceries, or babies!!
I love it- Wouldn't this be a fun to give as a gift???