Monday, November 1, 2010

Thanksgiving Book

This is such a GREAT idea!! I am totally starting one this year!!
Eighteen25 shared how every year on Thanksgiving everyone writes down what they are thankful for in the book of thanks. They also include a picture of the group they celebrated with that night and post it in next to the entries!
What a great way to remember the holiday and the reasons why we celebrate it!

Friday, October 22, 2010

Skeleton Costume

Awhile back, while brainstorming costume ideas for my son... I came upon this
The minute I saw it, I knew I needed to have it-
that is until I came back to reality and realized I probably shouldn't be spending $50 on a costume.
I went back into Pottery Barn Kids a couple times to check it out (always just to torture myself) and decided that I could make it myself.
And I did. 
I found some black sweats and long sleeve shirt at Walmart for cheap
and bought 1/4 of a yard of felt @ 50% off
Grand total: $7
I used Pottery Barn's costume as a general reference, cut out some bones and hand sewed them on. Took maybe 3 hrs max and I was done!!
(I liked the look of hand sewn better- think how much quicker this would be on the machine!)


It was such a fun costume to make and looks pretty stinkin cute on

Wouldn't you say!!
We had our first Halloween activity today and got to try it out
Let the fun festivities begin!!

Wednesday, October 20, 2010

Halloween Pillowcase!!

I made this a couple weeks ago for a little Halloween present for my son. 
It was a breeze to make and such a fun gift to give!!
 I used the tutorial on the MADE  blog here which was fabulous.

This could also serve multiple purposes!!
When I was probably too old to go trick or treating I took my pillowcase out as my bag and I must say, you can hold way more candy when you bring one of these!!

 I ended up making another one for my son to use after Halloween! Not going to lie, I could have made twenty more they were so quick and easy. 
I'm already on the lookout for some Christmas fabric!!


 If you are looking for a fast, fun project, this is the one for you!!!

Friday, October 8, 2010

Fall Rose Wreath

Ok a break from all the soup for a sec


I had to post this great project!
My friend showed me a wreath she had made last week 
and the minute I saw it I knew I had to make it too.
It's such a fun quick craft and perfect for the fall season
(actually, like always, I want to make one for every season!)
You can find the tutorial here
and another persons take on it here!!
{F.Y.I - For our wreaths, we used 1/4 yard yellow fleece, 1/4 yard green fleece and 1/4 yard brown felt. It was the perfect amount!!}

(just dont even mind the ridiculous amount of shine in some of these pics k!)
Happy Fall

Thursday, October 7, 2010

White Chili

Day 4
White Chili
This recipe will blow your minds, it's that good!!
You must try it out

White Chili

1-2 Tbs. olive oil

2 medium onions, chopped

1 - 4 oz can chopped green chilies

4 cloves garlic, minced

1/4 tsp cayenne pepper

2 tsp. cumin

1 1/2 tsp. oregano

4 chicken breats, cooked and shredded (I like to season the chicken with salt & pepper before I add it)

5 cups chicken broth

3 - 16 oz cans of white beans, undrained

3 cups Monterey Jack Cheese, shredded (I like to use Peppered Monterey Jack Cheese for a little extra kick)
Directions:

Saute onions, green chilies and garlic in olive oil and add spices. Combine beans, broth, and chicken with onion mixture. Stir over medium heat and gradually add the grated jack cheese. Stir until all cheese is melted and combined well with other ingredients. Heat to desired temperature.

Recipe from The Coterie- Any recipe my friend posts is delicious!!

Wednesday, October 6, 2010

Tortilla Soup

Day Three

This recipe is from my good friend and we LOVE it! 
I have craved this soup MANY times during this pregnancy-
It's just delicious!


Tortilla Soup


1 Yellow Onion
Cilantro (about 1/3 of the bundle)
1 t Minced Garlic
1 Can of Diced or Stewed Tomatoes
1/2 t Cumin
1 t Crushed Red pepper
4 C Chicken Broth
2-3 Chicken Breasts, Cooked and Shredded

Fry the sliced onion, chopped cilantro, and garlic in a little bit of oil. Puree this mixture with the tomatoes in a blender. Return the sauce to the frying and add the cumin. Simmer 5-6 minutes until the sauce thickens. In a separate pot bring the chicken broth to boil, add the red pepper, chicken and sauce (some people also add corn). Simmer 15-20 minutes to blend the flavors. Serve with tortilla chips and a little cheddar cheese on top. Or (our personal favorite) serve with quesadillas for dipping.

Tuesday, October 5, 2010

Broccoli Cheese Soup

Broccoli Cheese Soup
This was a delicious new recipe found here that we will for sure use again

Excellent Broccoli Cheese Soup 


Servings 6

Ingredients 

1/4 cup butter
  • 1/4 cup all-purpose flour
  • 3 cups chicken stock
  • 3 cups milk
  • 1/4 teaspoon salt
  • 1/2 teaspoon white pepper
  • 1-2/3 cups fresh broccoli florets
  • 1/2 pound processed cheese, shredded
  • 1 cup shredded Cheddar cheese


  1. Melt the butter in a large pot over medium heat, and mix in the flour. Reduce heat to low, and cook, stirring constantly, about 2 minutes. Mix in the chicken stock and milk, and season with salt and white pepper. Bring to a boil, reduce heat to low, and simmer about 10 minutes.
  2. Bring a pot of lightly salted water to a boil. Place the broccoli in the boiling water, and cook 2 minutes, or until just tender. Remove from heat, drain, and set aside.
  3. Gradually mix the processed cheese and Cheddar cheese into the large pot until melted. Mix in the broccoli. Continue cooking about 5 minutes.


For this recipe I thought it would be fun to serve in these pumpkin bread bowls found over at the Idea Room. Great, easy to follow instructions and as an added bonus, they taste good too!

{I made 5 pumpkins with this dough and felt like they were perfect size for my son but about 1/4 the size soup bowl my husband and I needed. We ended up just dipping them in our soup which turned out just fine. Next time I may just make two big ones and one small.....}

Monday, October 4, 2010

Soup Week.. Day One!!

To kick off the wonderful month of October, I love having what we call Soup Week. We LOVE eating soup- so why not dedicate a week to eating it. So for the next week I will be posting some of our favorite soup recipes in hopes to get you in the fall/soup eating mood and maybe even convince you to have a soup week yourself.

Enjoy!!! And please feel free to share your favorite soup recipe. I would love to include it on the blog!!!

Wisconsin Cauliflower Soup from Zupas!!

Monday
Taco Soup
It couldn't be soup week without this soup. Our favorite taco soup recipe, one my mother in law has been using for years.  Enjoy!

Taco Soup
1 lb. hamburger, browned
1 onion chopped
1 can chili beans
1 can kidney/black/or pinto beans
1 can whole kernel corn
2 cans diced tomatoes
1 80z can tomato sauce
1 40z can diced green chillies
1 pkg Taco Seasoning
1 cup water

Combine all in slow cooker for 8hrs. Serve with Fritos, cheese and sour cream

Thursday, September 23, 2010

Halloween Banner


I just had to make one for Halloween!!!
(sorry for photo quality, have had some gloomy days)

Such a great way to use up some extra fabric. (Or a great excuse to buy some more!)
I cut the letters out of felt and sewed on with the machine. 
I just love festive banners!!


Here are some other fun banner ideas/examples!

Eighteen25  (have you checked this site out?? Great Halloween ideas posted everyday!!!)

Tuesday, September 14, 2010

Cheesecloth Ghosts!!


{I have been wanting to put up some Halloween ideas for such along time.
So excited the season has finally arrived!!! }


A couple of years ago for my ward's Super Saturday, I was given the assignment to make and help assist others make cheesecloth ghosts. This idea comes from none other than Martha and is such an easy and fun decoration to get you into the Halloween spirit. Some of you may have even made these in Elementary school. I figured my blog wouldn't be complete without a little post about these ghosts!!
So...... if you are interested.... here are the steps


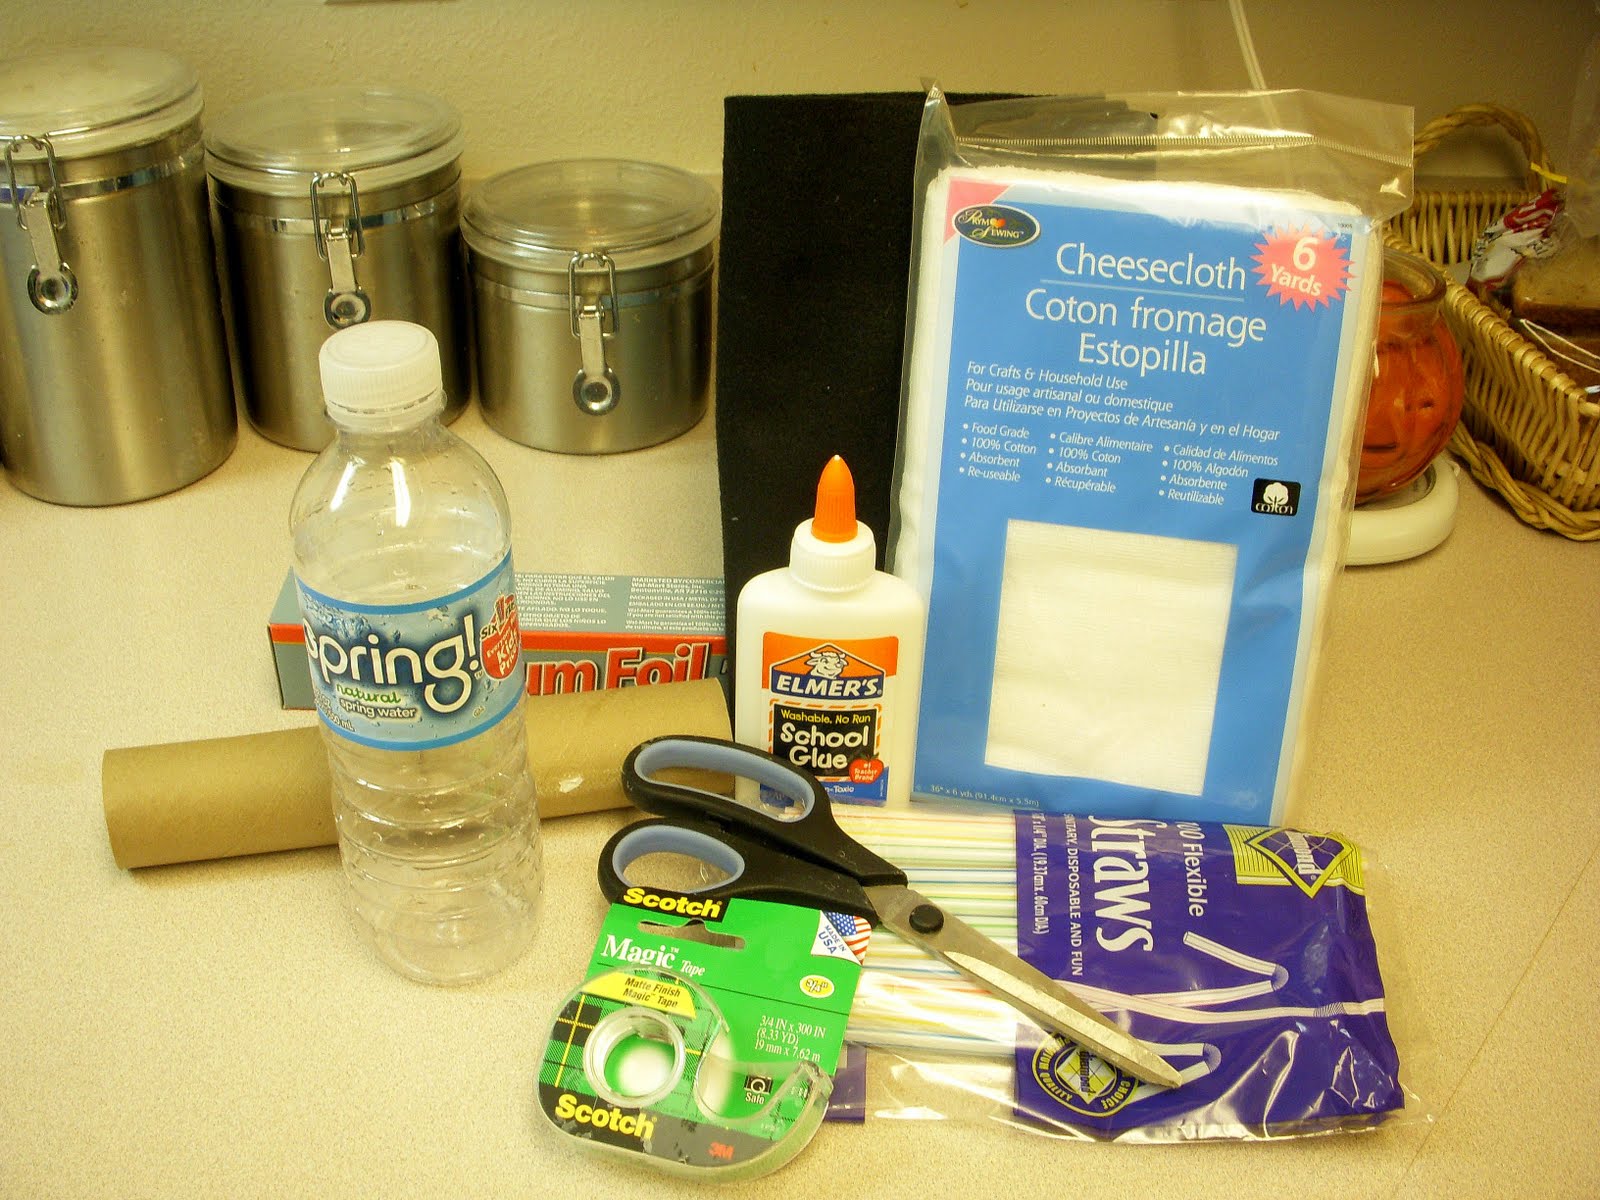
First off you need to gather these supplies

Next you will need to make the "body" of your ghost. This is the one that I used to make mine but you can use whatever you want!

As you can see for this one I used a toilet paper roll. You can also use a paper towel roll or a water bottle depending on the size of the ghost you want.
With the body established, you can now add your arms. We used straws which worked really well. I have also seen pencils or wire used, so it's up to you. 
Then I made the head out of aluminum foil and stuck it in at this top. (note.. I put a piece of saran wrap over top the foil to prevent the foil to stick to the cheesecloth)
Next, tape it down to a piece of cardboard or something that could act as a temporary base. (cutting strips at the end of the roll made it possible to fold out and tape down a lot easier)


Now for the messy part. Get your cheesecloth (which is practically the same thing as gauze which can be found at any grocery or craft store) and drape it over your "body". Do this before the glue so you can plan out how you want it to look. Then take the cheesecloth off and drench it in glue. The more the glue, the stiffer the ghost. I have seen some people apply glue to the cheesecloth while it was on the "body" and others, including me, put it on after. There are many ways you can do this (dipping it into a bowl of glue, folding it up and then pouring glue on) Basically, whichever way works.


Now, if you didn't do it earlier, drape the saturated glue on the "body" and form it however you like. 

Next add the eyes. I used felt for mine, however marker, paper,stickers etc.. can work as well. You can also add a mouth if you like. Let dry overnight or for about 5 hours.

 After ghost is dry, remove the ghost from the base as well as the "body" and you are done!!

Despite being stuffed and squashed into storage year after year, my ghost has kept its form and remains one of my favorite decorations!
I have been wanting to make a little ghost family but we will see if that ever happens!!

Monday, September 13, 2010

Fabric Pumpkins

Have you made yourself some fabric pumpkins yet this year??

I have been wanting to for along time now and finally, thanks to my awesome crafty friend, I made some!!

I used the tutorial over at the Idea Room and they were a lot of fun to make!!

Such a fun project to get you into the fall season!!

I love this time of year!!

Tuesday, September 7, 2010

Root Beer Sampler

When I saw this idea on my good buddy Jill's blog awhile ago I knew it would be perfect for my root beer loving husband. Luckily his birthday was yesterday and I didn't have to wait any longer to do this for him.


I must say this is one of my favorite gifts I have given- and to make it even better.... my husband LOVED it! So win win. For the Mr.'s root beer sampler- I used the IBC container and filled 6 different glass root beers. Finding the different root beer was actually more fun than I thought it would be. Most grocery stores have them- For me, out here in the Midwest- Hy-vee provided a 3, World Market 2 and Machine Shed 1. There were actually a lot more at each of these places but were only sold as a 6 pack.  Since I wasn't wanting to spend too much money, I opted for the single bottles. (This would be such a fun thing to do with a bunch of your girlfriends, sisters, mom etc.. each buy a couple 6 packs and share!I thought a lot of the bottles in the 6 pack were cuter) I would have also loved to have given him more but stuck with 6... this time!

Something else I loved was making the root beer sampler guide. Along the same lines as this one and this one. (except minus the color for me- color printer still in Utah) By googling each root beer brand, I was able to find some fun blogs dedicated just to root beer with great reviews! (Cosmo's Root Beer review, Spikes Root Beer reviews, and King of Soda ) I compiled it with a little help from Picnik and was set to go!!

SO SO fun!! It was a pretty simple project too! Hope you enjoy!!

Tuesday, August 31, 2010

S.L.A.C.K.E.R.

Yep, I have been a craft slacker....

#1 reason- August was not the nicest to us. After my two year old son broke his precious little arm, we all endured colds and later on the stomach flu.
#2 reason- My current "project" -
{baby #2 coming Feb 2011}
One I know will turn out just perfect
#3- Lazy and tired..... {see reason #2)

Luckily, I am getting my energy back and have even pulled my sewing machine out for a craft or two. Also, for some crazy reason, I decided to make a felt playhouse for my boy for Christmas. I am in the not so fun cutting stage but it is turning out pretty dang cute and excited to see how it turns out!!! (All I have to say is he better like it!) Pictures to come soon!

For now, here is a Table Runner Tutorial I found over at Diary of a Quilter
This is a project I have started on and have hopes to get done before fall is over. I have a feeling I will want to make one for each holiday!!
U create just posted many examples of those who followed this pattern!! So so cute!
Enjoy

Wednesday, August 11, 2010

Button Earrings

I have been meaning to make button earrings for a long time now and finally got around to making them today!
This was the easiest and greatest project ever.... and took me under five minutes to do!
 I'm sure most know how its done but will post directions just in case. 

First- buy some buttons that you think would look fab. as earrings
(as you can see, I kinda was having a thing for roses when I went button shopping)

Buy these

Heat up your glue gun

If your buttons have something on the back, snip it off with a good pair of scissors or have your man and his heavy duty equipment get it off for you!

Once off, you are all set. Just glue the backing to the button and you have yourself a cute new pair of earrings!!


Such a GREAT easy gift idea!!

So start looking through your old stash of buttons and make yourself some earrings!!

Thursday, August 5, 2010

Amazing Deal!!


There is one reason why my blog has been low on craftiness lately..........
(you know the site where you can turn your blog into a book)

I found a code here at Leelou Blogs

and Guess what this code gives you....
$39.95 off the total of your book order!
Seriously, that's more than most the books cost.
This is a great deal

I have used BLURB before and was happy with the results. 
I also used the code last night and it worked!!

So hurry, get those books made, it expires the end of August!!


you're welcome :)

Tuesday, August 3, 2010

Pretzel Jello Salad

(not my pic...image found here)
While I was home, my family was talking about food and how if you had to choose one meal/food item to eat for the rest of your life.... what would it be
This recipe was my brother's answer! (yes the same brother who at a whole raspberry pie) love him!

but seriously..... it is that good. I maybe would have to consider it as well

So here is my mother's delicious Pretzel Jello recipe...
 believe me, you need to have it!


Crust:
2 cup crushed pretzels  ( I put in blender or food processor) 
Reserve a few pretzel crumbs for top.
1/2 cup melted butter
2 Tablespoons sugar

Mix and press into 9 x 13 pan.  Bake at 350 degrees for 10 min.

Middle:
small tub cool whip
8 ounces cream cheese (softened)
1 cup sugar

Beat well add to cooled bottom crust.

Refrigerate until set.

Top:
2 large packages of Strawberry Jello
3 1/2 cups boiling water
2 boxes of strawberries   ( I usually use frozen so Jello will set faster)

Mix and let set until ALMOST jelled.  Top other layers.

Optional:  I top the jello layer with another layer of cool whip (small tub)
       and sprinkle reserved pretzel crumbs on top.


Let me know what you think!!

Oh and what would you eat if you could only have one meal for the rest of your life???

can my answer be Mexican food?? :)

Friday, July 30, 2010

Travel Organizer

One thing that drives me absoultly nuts while traveling is how cluttered and dirty our car can get. This would have been a great thing to have on our trip to Utah. Such a great idea that I may have to tackle before our next roadtrip!!!

picture via Fabulous on a Teachers Salary
Find the tutorial here

Thursday, July 29, 2010

Pillowcase Fun


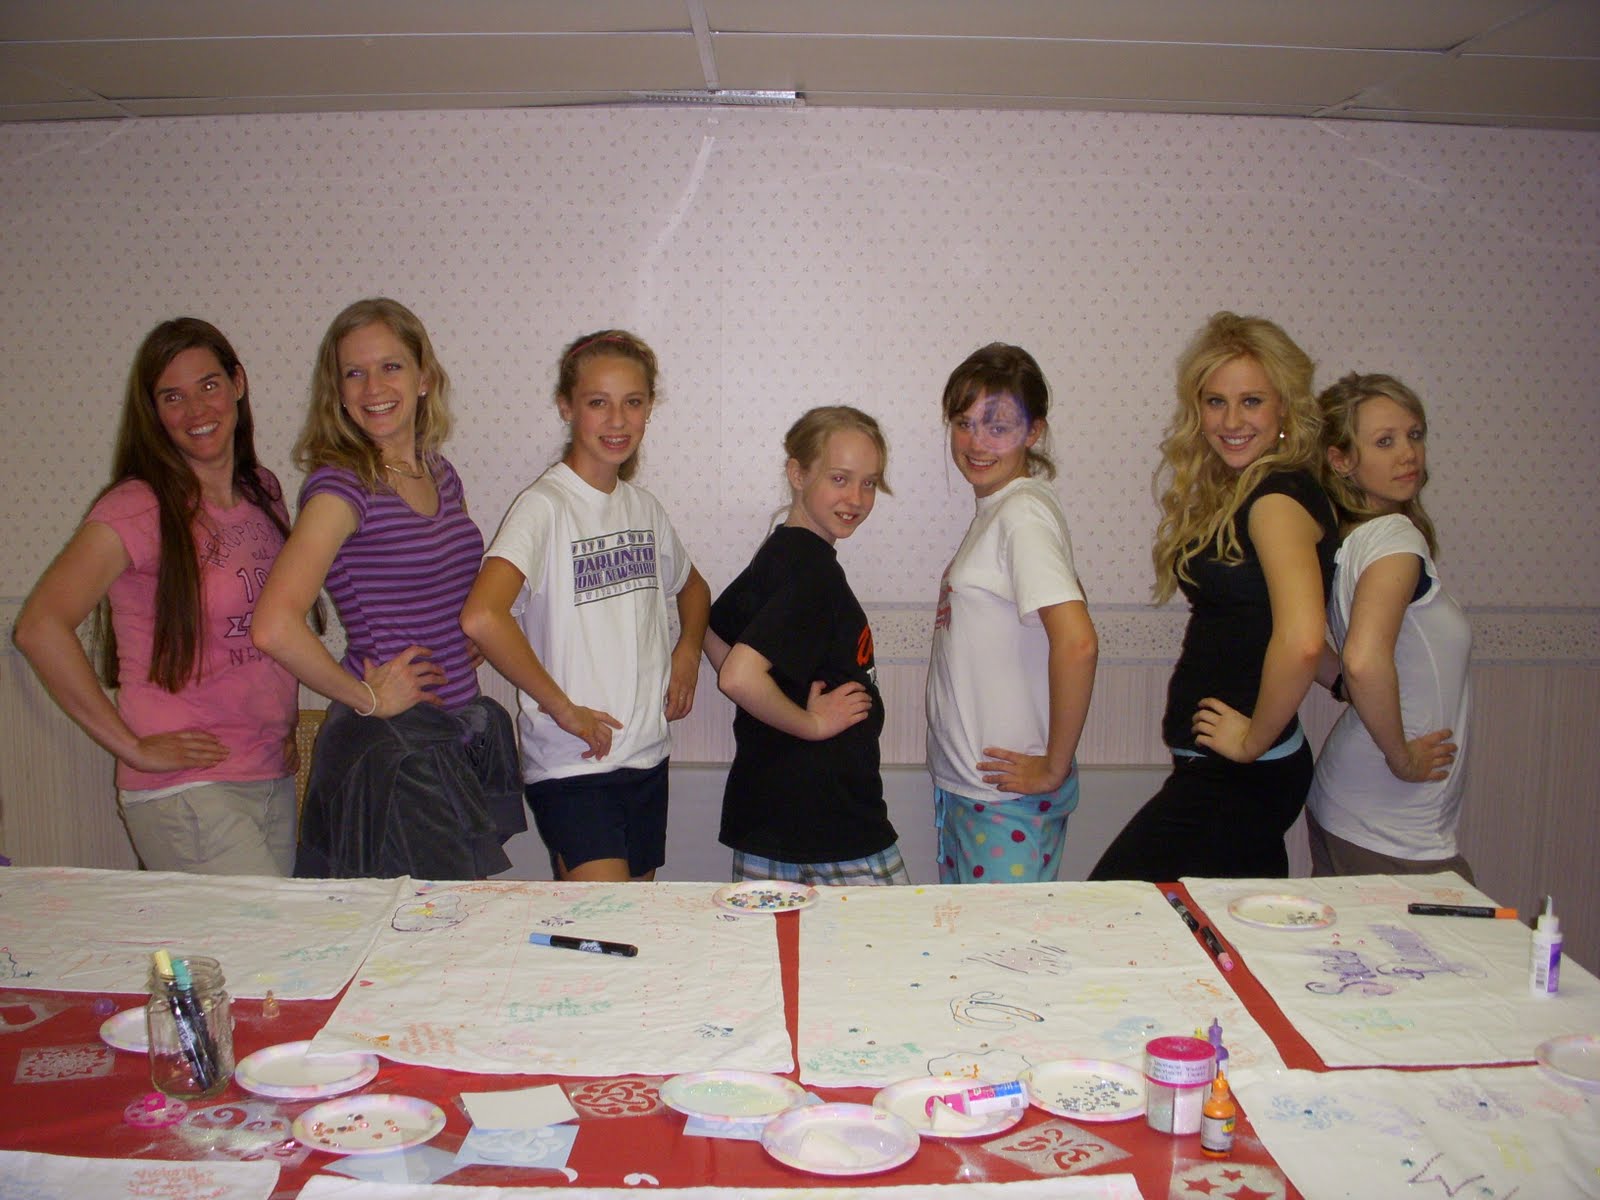
At one of my family reunions this past month, I was in charge of organizing a craft for 11 little kiddos. I instantly thought back to over a year ago, the night before my brothers wedding at a cousin pajama party. 

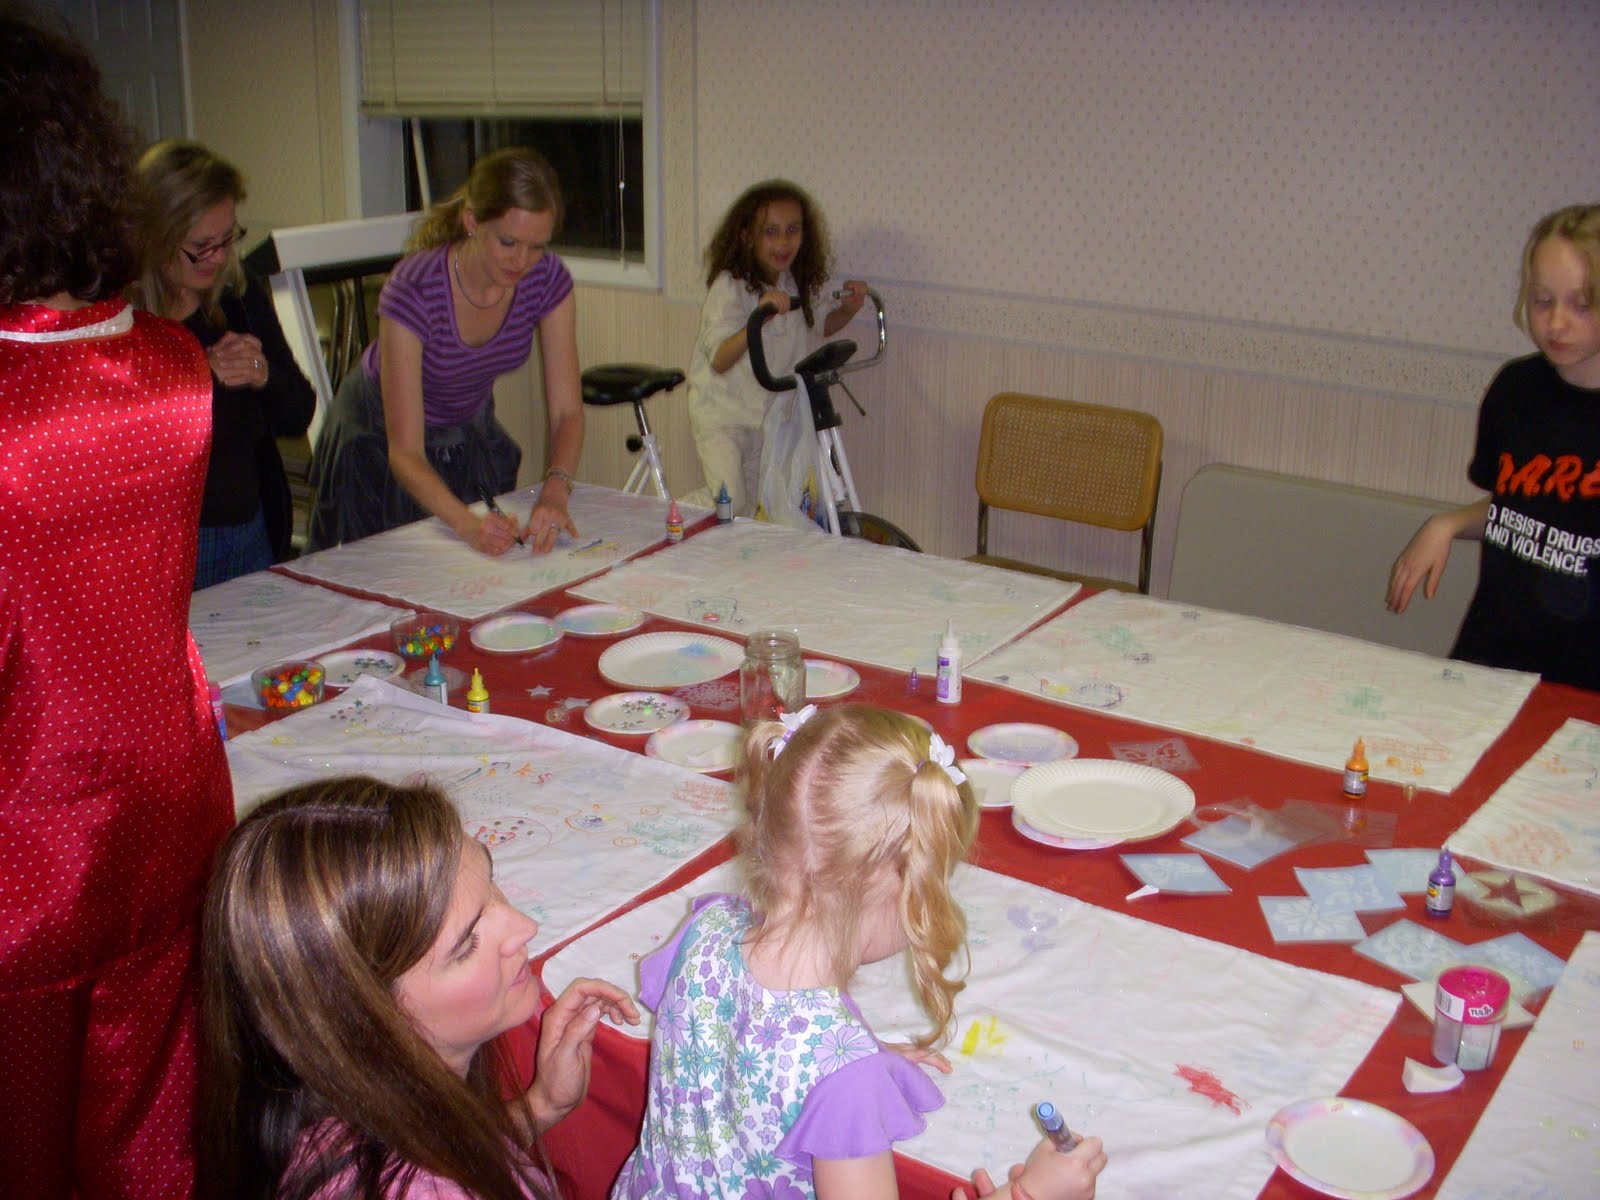
That night we each decorated our own pillowcases with paint, markers, jewels, glitter, etc.....  The possibilities are endless with what you can use. We then went around leaving messages for each other. Think of it as yearbook signing with pillowcases! It was SO much fun and seriously all ages were easily entertained!! It is such a great thing to have since most of us live far away from each other!! 

I knew this would be a great idea for my little nieces and son. The kids got so into it and even had all the aunts/ uncles and grandparents sign too. Instead of paint, however, we used fabric markers to decrease the mess. Such a fun, simple idea that kept all of us entertained!!

Monday, July 26, 2010

Arlene's Raspberry Pie


Arlene was my adopted Grandma. She and her husband were our next-door neighbors growing up. They were unable to have any kids of their own so we took the liberty of becoming their "grandkids". I was around three years old at the time. They have been family ever since. 
Birthdays, baptisms, parties, Christmas- they were always there. 
I loved to sneak over there first thing in the morning to share a bowl of Wheaties with Harold, this would freak my mother out when she would go into my room and see my empty bed!! Unfortunately, both have passed away, however, the great memories we shared with them will always be with us.

One of my families fondest memories of Arlene was her Raspberry Pie. She made them every year in July and believe me, it was like Christmas for us, something we looked forward to all year. Her raspberry pie was THE BEST, and only used freshly picked raspberries from her garden. We devoured them the second she brought them over, they were that good. I remember one time I had been gone when the pies were delivered (big mistake) and when I got home, I found that one of them was completely eaten.... by my brother. Let's just say he was in big trouble :)
So to carry on the tradition of eating Arlene's pies in July, I decided to try and make them on my own. 
The recipe is surprisingly simple and the pies turned out great (of course they can never beat the original)

So here is the recipe, exactly how she made it. I'm sure there are many ways to change it up, but this is what tastes good to me!

Arlene's Raspberry Pie
1 Graham cracker crust 
1 large package of Raspberry Jello
1.5-2 pints of raspberries
1/2-1 Pint Heavy Cream (homemade whipped cream is a MUST)

Prepare Jello according to package directions.
After about 1-1.5 hrs in the fridge, add the fruit and place in the crust. 
Continue refrigerating another 2 hours or so

Prepare homemade whipped cream (I beat it for about 5 min, add some powder sugar and some vanilla)
Spread on top, you can never have too much!

That's it. Pretty simple, but such an amazing taste!!
Hope you enjoy it 

Thursday, July 22, 2010

Sun Dried Tomatoes Anyone??


Here is what happens when you are too lazy/ kinda forget to ask someone to water your plants when you are gone for a month. (At least we got some tomatoes out of  it before we left)

Anyone feel like this blog is looking like these tomatoes???? Well I have been visiting family in Utah for a month and didn't have time or desire to post while I was away, and that's ok right!! Enjoyed some great, well needed familiy time. I should have some fun posts up sooner than later.  Right now, however, I have 1,000- pictures to upload and sort out, + items in my Google reader, loads of laundry to do and items on my to do list. Man, vacations are tough! Hope everyone has had a great summer so far.